
How to Pick the Right Monitor Mount as a Tailer-Made for Your Requirements
- 2020-09-11
Surveying for a monitor mount is like picking the right wedding dress/suit. The customization one makes people feel confident and always be the best. Here are the benefits of learning how to find perfect monitor arms. It allows you to achieve your ultimate setup, save valuable desk space, reposition monitors to a comfortable viewing angle, and declutter your workspace. Finally, you don't want to waste your money and time trying and error.
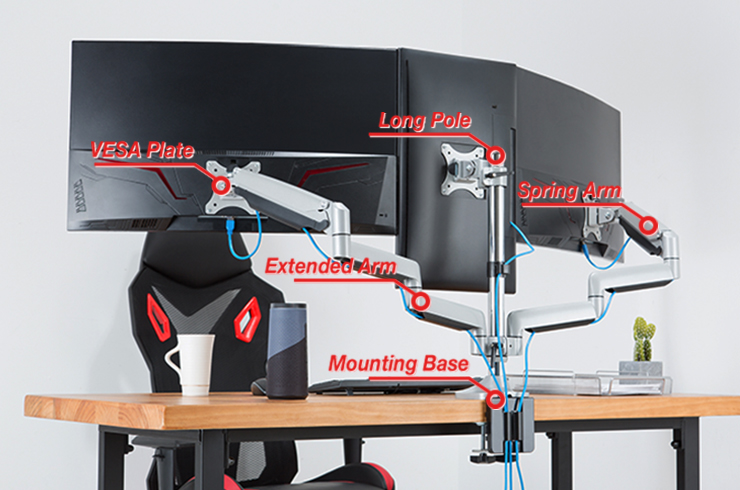
You'll learn the monitor arms' structures in this post, such as mounting base, tall pole, extended arm, spring arm, and VESA plate. Also, we'll introduce the tips for using monitor arms and make you understand how to check the compatibility of your monitors and mounts. Even you didn't own the displays yet.
You'll be able to pick a perfect computer monitor mount after watching this video. Instead of waste your precious time to take down, repack, and return the unsuitable product. Let's dive into it.
The mounting base is the core foundation that affects the compatibility with desks, ease of installation, stability, and arm flexibility. The standard mounting options are c-clamp, grommet (bolt-through-desk), freestanding, and wall mount.
We have filmed another video introduce the details about the mounting bases. Here is the link, or you can find it in the description.
Traditional C-clamp
The c-clamp is usually compatible with the .4" to 3.5" thickness of the desk (it may differ by each brand. Please check specs carefully before purchasing). It cannot support the desk without enough clearance on edges, such as the executive desk, credenze desk, secretary desk, and roll-top desk.
Compatibility with Desks: ⭐⭐⭐
Ease of Installation: ⭐⭐⭐⭐
Stability: ⭐⭐⭐⭐
Arms Flexibility: ⭐⭐⭐⭐
TIPS: If your desk is against the wall, you need at least 1.5" space for mounting the c-clamp base. Furthermore, the fence limits the arm's movement.
Top Mounting C-clamp
The top mounting c-clamp is similar to traditional but much easier installation. You can finish the entire process on the desk. Therefore, you won't get dirty on your hands and knees crowded under the desk.
Compatibility with Desks: ⭐⭐
Ease of Installation: ⭐⭐⭐⭐⭐
Stability: ⭐⭐⭐⭐
Arms Flexibility: ⭐⭐⭐⭐
TIPS: This kind of clamp has a low-profile design. That is why the top mounting c-clamp is compatible with a standing desk converter. It won't interfere with the mechanism when adjusting to a sitting position.
Grommet Mount (bolt-through-desk)
You can use the existing grommet hole to gain maximized stability and arm flexibility. You can decide where to mount the system by drilling a tiny hole in which the diameter as a bolt (some heavy-duty monitor mounts bases have two bolts).
Compatibility with Desks: ⭐⭐⭐⭐
Ease of Installation: ⭐⭐⭐
Stability: ⭐⭐⭐⭐⭐
Arms Flexibility: ⭐⭐⭐⭐⭐
TIPS: When using a corner desk or the desk flush against the wall with multi-display, choose a grommet mount to regain the flexible arms movement.
The Highest Compatibility with Freestanding
Yes, you probably notice it is no different from your current monitor stand. The freestanding stands benefits come when you have multiple monitors. It integrates the original monitor stands also gives a bit more adjustability.
Compatibility with Desks: ⭐⭐⭐⭐⭐
Ease of Installation: ⭐⭐⭐⭐
Stability: ⭐⭐⭐⭐
Arms Flexibility: ⭐⭐
TIPS: The freestanding base relies on balanced weight distribution. Overextend your monitors may cause a collapse.
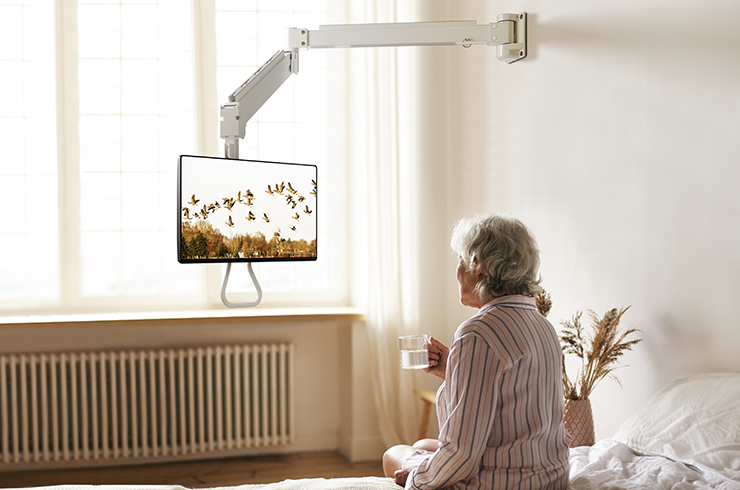
Wall Mount - Float Your Monitors Neat & Tidy
Mounts the computer monitors on the wall gives the ultimate flexibility and ergonomic positions. But the drawback is permanent damage to your wall. Additionally, the user should consider the leveraged weight when mounting more massive monitors on a wooden wall.
Ease of Installation: ⭐⭐⭐
Stability: ⭐⭐⭐⭐⭐
Arms Flexibility: ⭐⭐⭐⭐
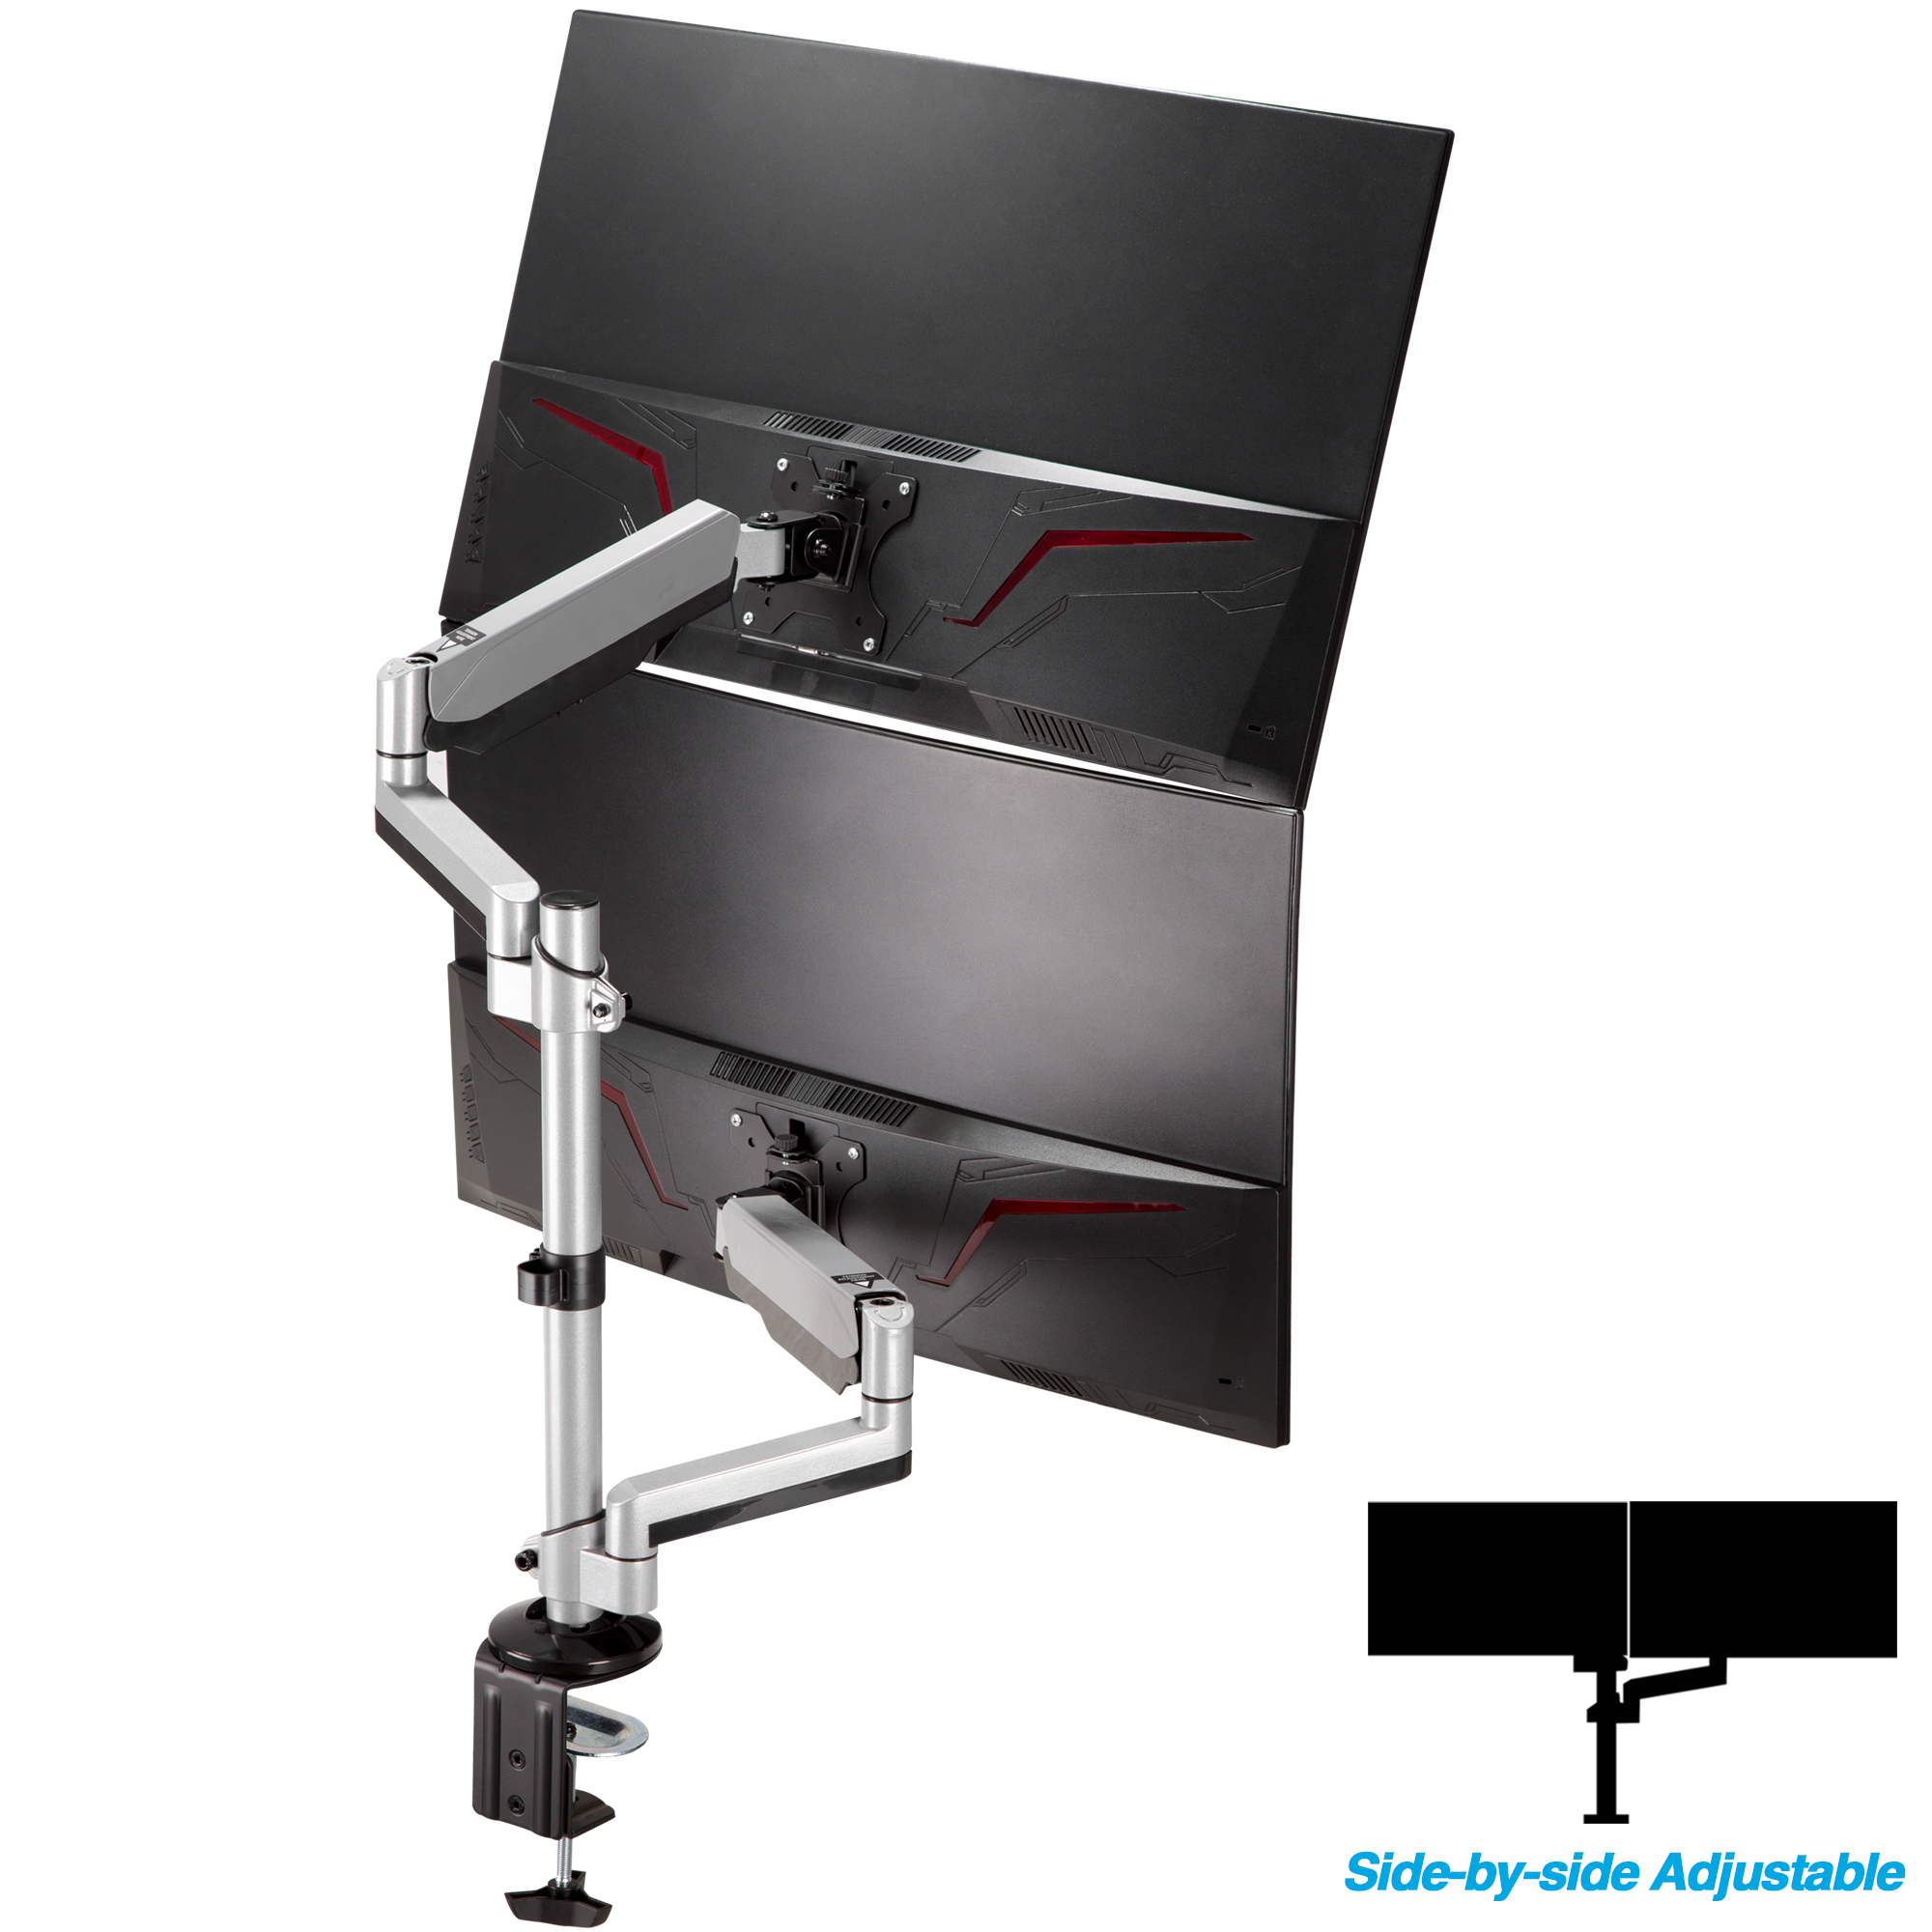
Long Pole for Vertical Monitor Stand & Extra Height Adjustment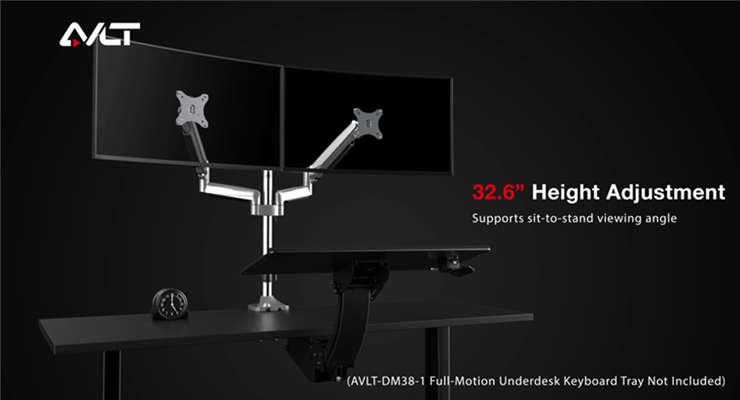
The tall pole provides an additional height adjustment range. Besides, it also increases flexibility in the whole constructure because the pole equals multiple mounting pivots, which allows the stack of two monitors, three side-by-side monitors, and up to six monitors array.
For stacking two 27-inch monitors, you'll need two individual arms on a pole. Also, the max arm height is required 23-inch. As for stacking two 32-inch monitors requires a 28-inch height.
TIPS: If your monitor's VESA mounting holes aren't in the center, you could technically use the VESA rotation to place your monitor much higher/lower.
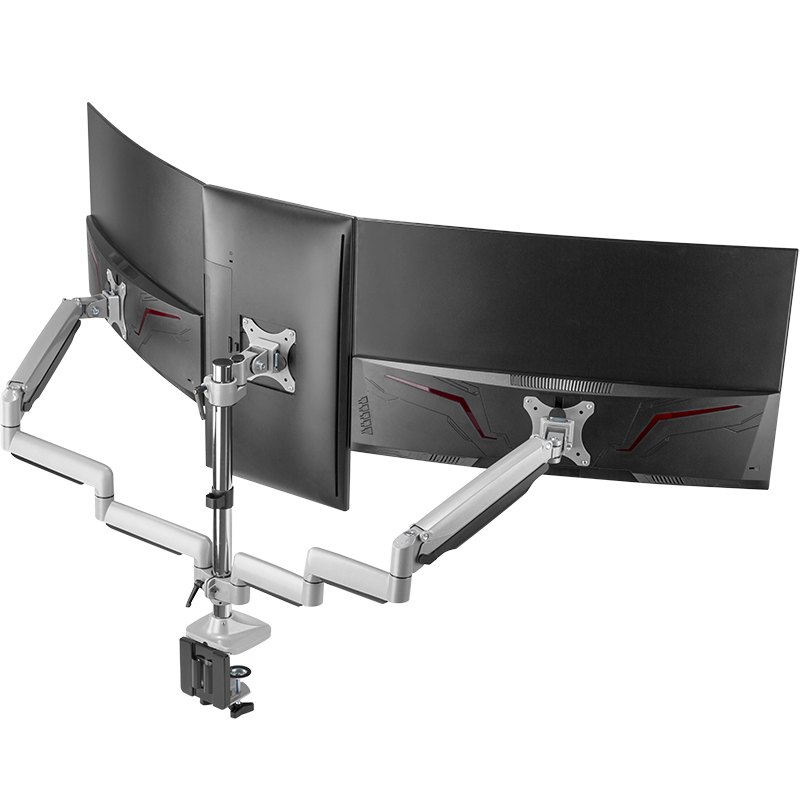
Extended Arm
The extended arms are designed to add fixed height and length for the monitor stand. It will also help regulate the relative positions of the dual monitor setup, especially your desk against the wall. You'll need a short arm or stack-able extended arms to achieve the two monitors in a seamless side-by-side layout.
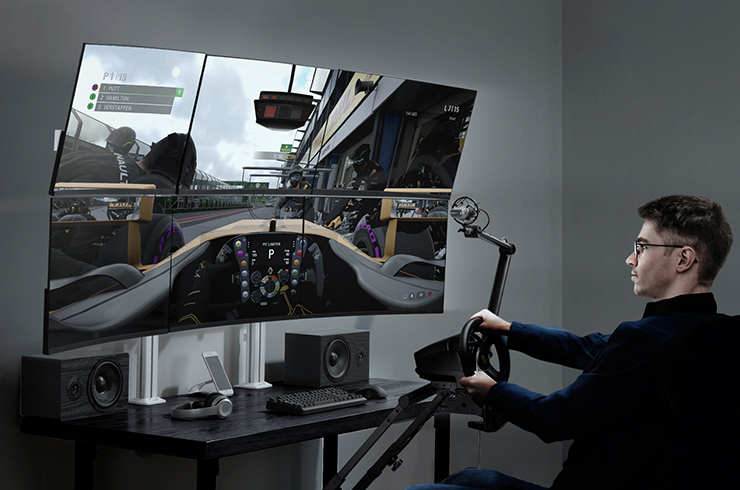
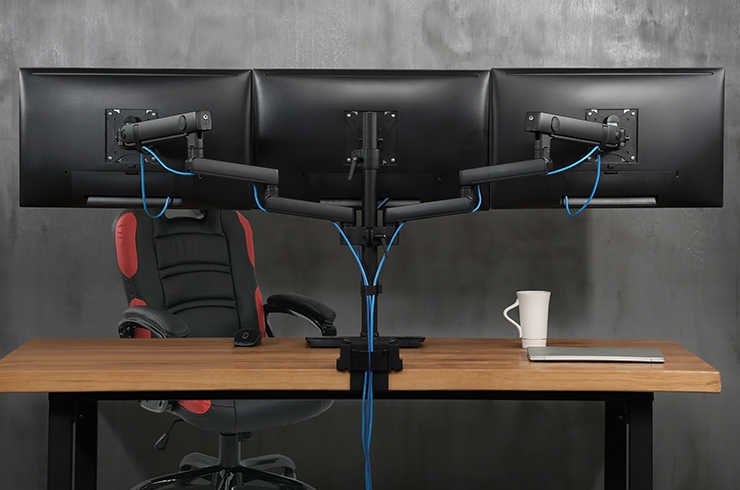
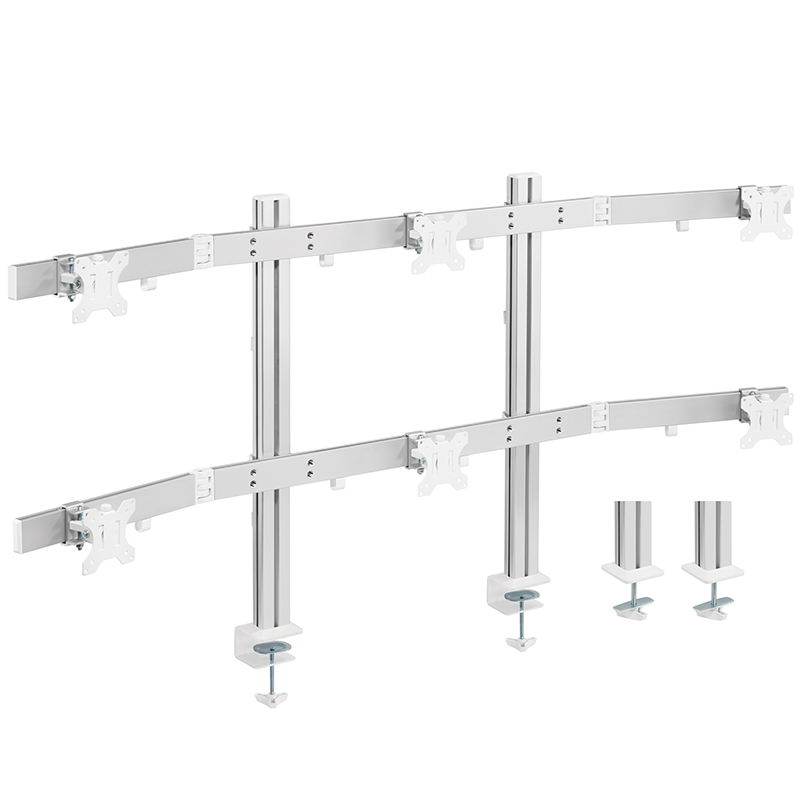
It also plays an essential role in a triple monitor setup. The inward angle of side monitors is critical for the immersive and ergonomic experience. Building a flight and car simulator will need more extended arm length to complete the perfect configuration.
TIPS: We have a triple monitor arm that has individual parts that help extend the arm length.
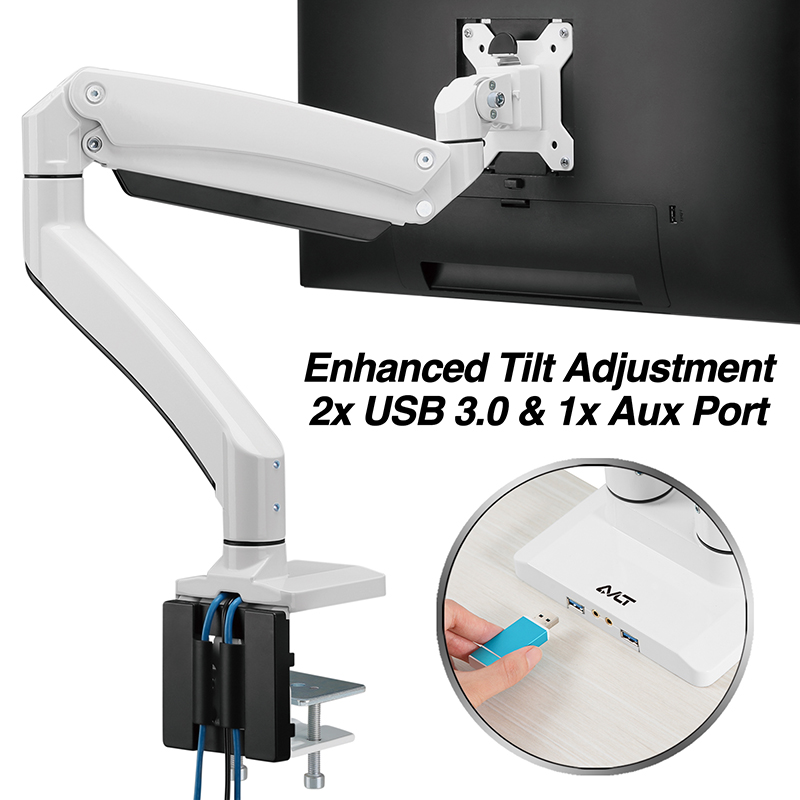
Spring Arm
The gas spring system will counterbalance the monitor weight, allowing you to adjust the monitor height with a finger touch. It's designed to make the monitor adapting to your sitting posture naturally.
With floated monitors, aligning the two different brand's monitors becomes much more manageable. However, it takes some time to adjust the gas spring system to counterbalance your monitor weight. Here are some tips for fine-tuning the gas spring system.
After attaching the monitor to the gas spring arm, hold it to the horizontal level with the desk before adjusting it. Turning it to "+" direction increases the arm's tension when you feel the arm droop; On the contrary, the monitor goes up, you need to decrease the pressure by turning it to "-" direction.
For mounting ultra-wide monitors (21:9 or 32:9), you must consider the monitor leveraged weight caused by a wider ratio.
VESA Mounting Standard
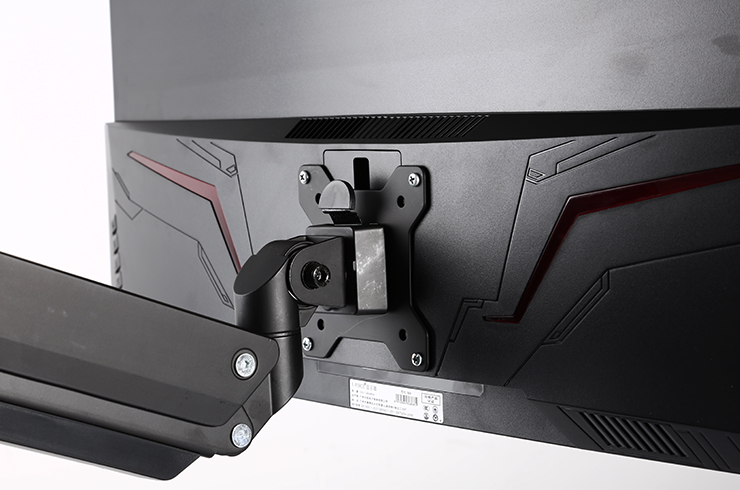
The VESA plate is the most crucial portion of connecting a monitor to the arm. The VESA standard defines the dimensions of the four-hole interface on the back of displays.
We use 75x75mm and 100x100mm VESA standards on our monitor mounts. You can easily find it on the back of your monitor. Also, it may hide under the original monitor stand that comes from the manufacturer.
A quality VESA plate supports detailed adjustments, such as rotation, swivel, and tilt. To rotate the monitor allows converting each monitor from landscape to portrait mode. And, the swivel and tilt adjustment make the monitors facing your comfortable view quickly.
Don't see a VESA on your monitors, not a 75x75mm or 100x100mm VESA mounting hole?
For non-VESA monitors, we've designed some adapters for connecting the monitor and arm. You can find it in the product description. Please note that the VESA adapters may increase the leveraged weight to the whole system, so you should choose a monitor arm with a higher weight capacity for safety.
You've understood the whole constructure of a monitor arm. We'll get a summary of how to check the compatibility of the monitors and mounts below.
1. Find the best mounting base that is compatible with your desk. It saves valuable workspace after installation.
2. Confirm whether your monitors have 75x75mm or 100x100mm VESA Standards.
3. Check your monitor weight without the original stand and ensure it is under the monitor arm's limitation.
4. Knowing the VESA gaps is the distance between the VESA mounting hole of each monitor. When building multiple monitors in a side-by-side setup, the arm length must longer than the VESA gaps to reserve flexibility.
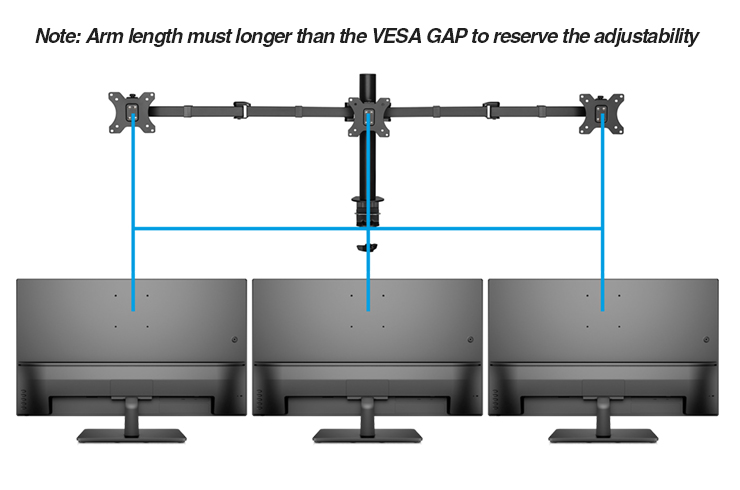
5. Triple monitor flight or car simulator requires longer arm length for the immersive experience. If you want to adjust side monitors 30-degree inward, please make sure the arm length is longer than the VESA gap 1.3 times.
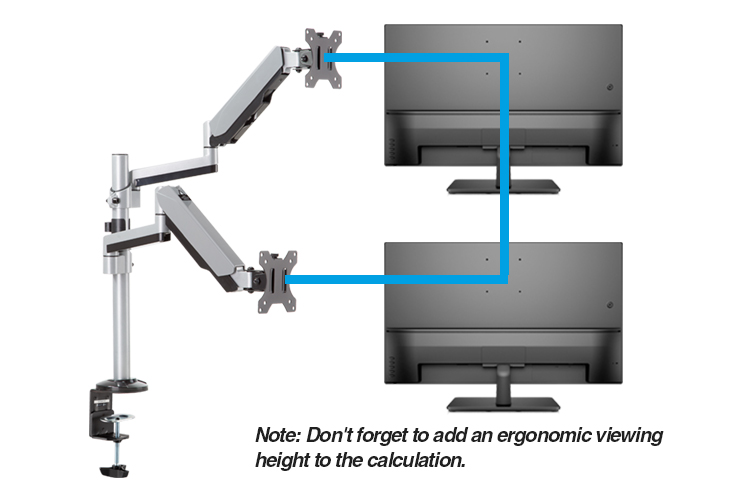
6. For stacked two monitors, the total arm height is required much higher than the vertical VESA gap. And you must add the necessary distance from the desktop to place the bottom monitor in an ergonomic position.
Thanks for watching this video, and I hope you'll achieve your ultimate setup goal smoothly. If you feel this video is helpful, please click the like, subscribe to our channel, and turn on the little bell.
If you have any questions about this video or any concerns about finding a monitor mounts product, please comment below. We'll reply to you very soon. See you!
Find the best monitor arms on Amazon: https://amzn.to/3bNK7ap
- Copy url:

Leave a comment